
Using Storybook as a Visual Testing Platform

9 min read
My experience working with this strategy of testing (which does not replace the others) and the integration with my current development tool.
I’ve always had visual testing in my TODO list until a few weeks ago when I finally decided to mark it as done. In this article, I am going to share my experience working with this strategy of testing (which does NOT replace the others) and the integration with my current development tool: Storybook.
In case you don’t know what Storybook is, this is the definition they provide on the official website:
Storybook is an open source tool for developing UI components in isolation for React, Vue, and Angular. It makes building stunning UIs organized and efficient.
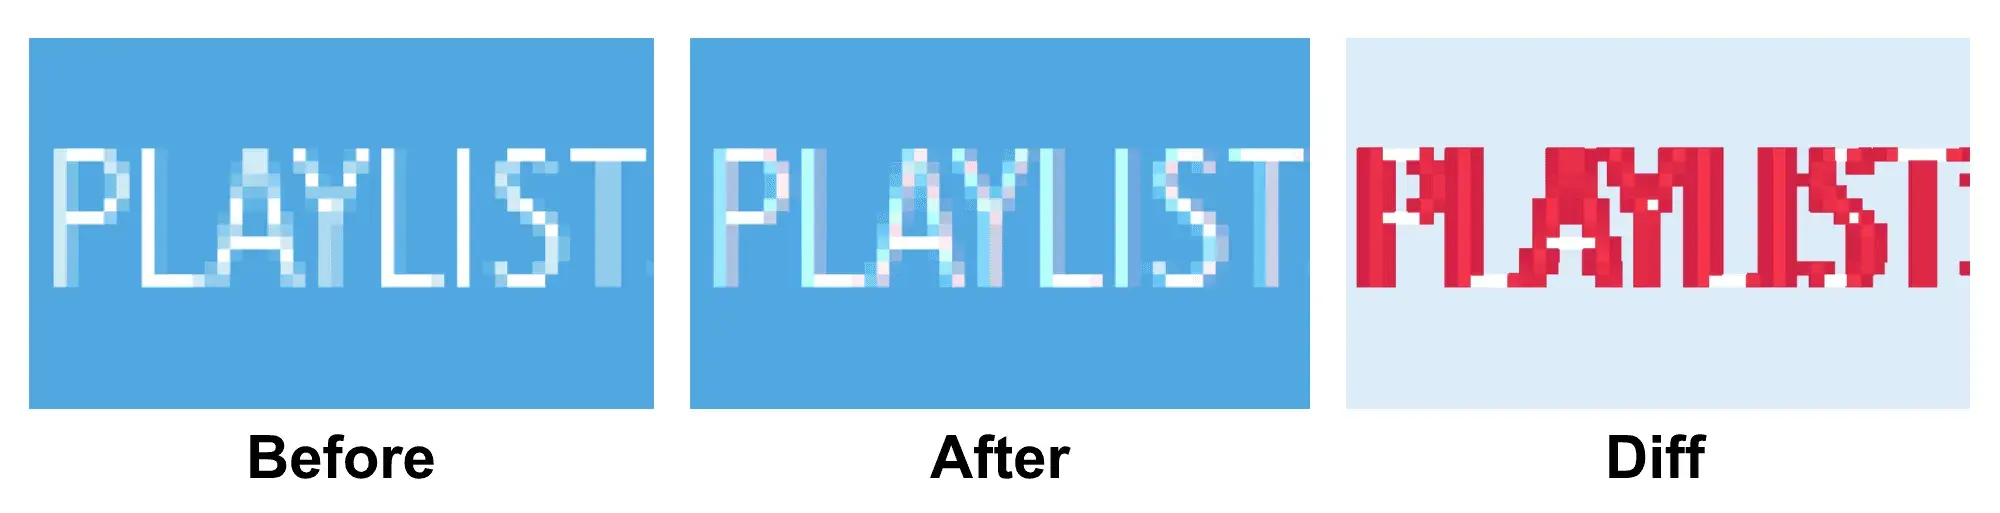
Regarding visual testing, it’s a testing approach that consists of taking real pictures and then compare them with the previous version. This comparison is made by comparing both pictures and checking if the pixels match.
In case you already understand the concept of Snapshot Testing, this is the same. The difference is you compare a picture and not some resulting code.
In case you are thinking “But how are these two concepts connected?”. Storybook insists on developing your components in isolation, which is the best scenario to do Visual Testing in order to avoid unwanted differences in our images. One way of thinking about this approach is like, every story defined in Storybook is a visual test in our application.
One last thing before checking the implementation, there are excellent services out there that I tried and they work flawlessly like Percy, Applitool, and many more. In this article, I want to show the *handmade way *of implementing a visual testing workflow, which has its own cons and pros regarding the mentioned services.
Let’s start with a fresh project by bootstrapping it with create-react-app and installing Storybook using its CLI.
$ npx create-react-app visual-testing-with-storybook
$ cd visual-testing-with-storybook
$ npx -p @storybook/cli sb init
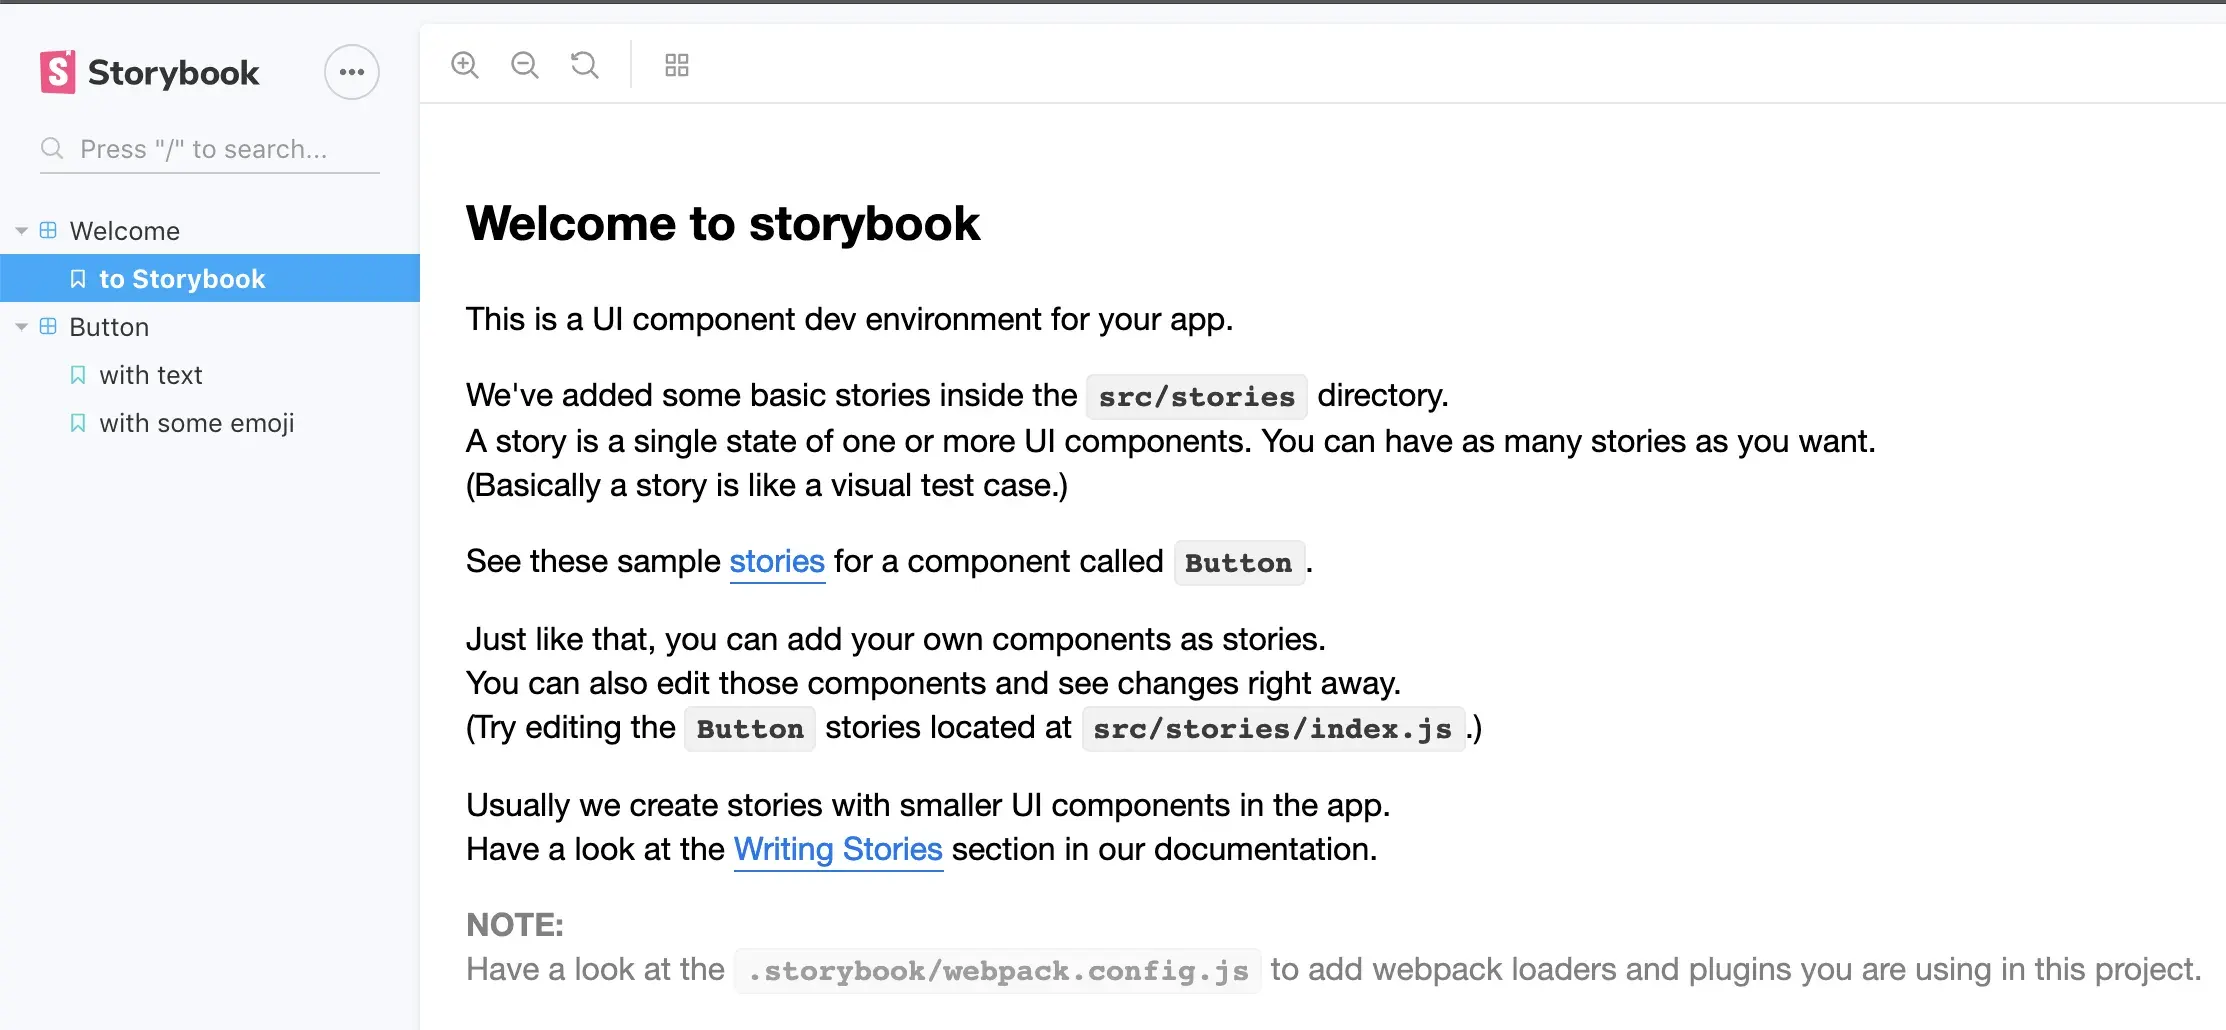
When the installation is finished you can check if everything was set up properly by running yarn storybook , and you should see the Homepage with two stories that were created by default.
Now let’s create a simple component for testing. I decided to create a simple Button called DuplicationButton , in which every time the user clicks on it the children provided by props will be duplicated. Not really useful but it will serve as a great example!
import React, { useState } from "react";

const ButtonStyle = {
  padding: "10px",
  borderRadius: "5px",
  fontSize: "16px",
  border: "pink 3px solid",
};

const DuplicationButton = ({ children }) => {
  const [count, setCount] = useState(1);

  return (
    <button style={ButtonStyle} onClick={() => setCount(count + 1)}>
      {new Array(count).fill(children)}
    </button>
  );
};

export default DuplicationButton;
Let’s add some stories for the component.
import React from "react";
import { storiesOf } from "@storybook/react";
import DuplicationButton from "./DuplicationButton";

storiesOf("DuplicationButton", module)
  .add("Good", () => (
    <DuplicationButton>
      <span role="img" aria-label="angel">
        😇
      </span>
    </DuplicationButton>
  ))
  .add("Bad", () => (
    <DuplicationButton>
      <span role="img" aria-label="devil">
        😈
      </span>
    </DuplicationButton>
  ));
Generating tests based on stories 🧪
In order to implement one test per story, there is a really helpful add-on in Storybook called storyshots. In order to install it, you need to run:
$ yarn add -D @storybook/addon-storyshots react-test-renderer
Then create a test file where you initialize storyshots. Let’s name it storyshots.test.js.
// src/storyshots.test.js**
import** initStoryshots **from** '@storybook/addon-storyshots';

initStoryshots({ */* configuration options */* });
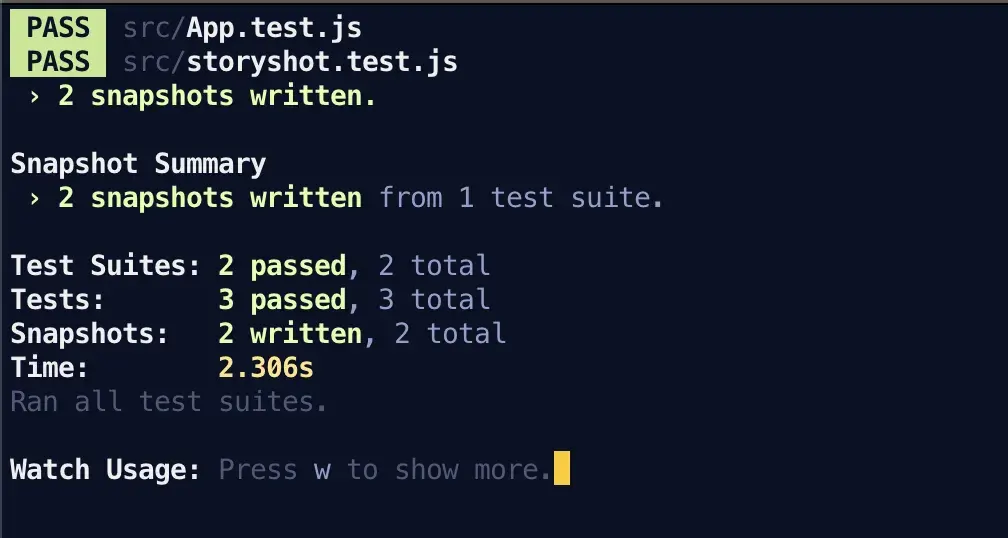
In order to run it, execute yarn test. Now for each story, there is a test with a snapshot where you can check what is the output (component rendered) of the story. These snapshots are going to be automatically generated every time we run our tests, and in case they have a difference with the previous one the test will fail.
Let’s get Visual! 🌈
In the code from above, the function initStoryshots accepts a configuration object with an option called test that allows us to change the comparison method for each story/test.
Luckily, there is an add-on called storyshot-puppeteer , which as the name state creates an instance of a browser, navigates to the story, takes a picture and compares it with the previous one! In order to install it:
$ yarn add -D @storybook/addon-storyshots-puppeteer
Then inside the storyshots file, you need to override the test comparison with imageSnapshot from the puppeteer add-on. Also, it’s needed to specify the URL where storybook will be running in order to know where to navigate.
// src/storyshots.test.js
import initStoryshots from '[@storybook/addon-storyshots](http://twitter.com/storybook/addon-storyshots)';
import { imageSnapshot } from '[@storybook/addon-storyshots-puppetee](http://twitter.com/storybook/addon-storyshots-puppetee)r';

initStoryshots({
  test: imageSnapshot({ storybookUrl: '[http://localhost:9009/'](http://localhost:9009/') }),
});
One thing to mention is that now our tests depends on having an instance of storybook running. I recommend managing two terminals at the same time for this kind of scenarios: in one terminal you run yarn storybook and in another yarn test .
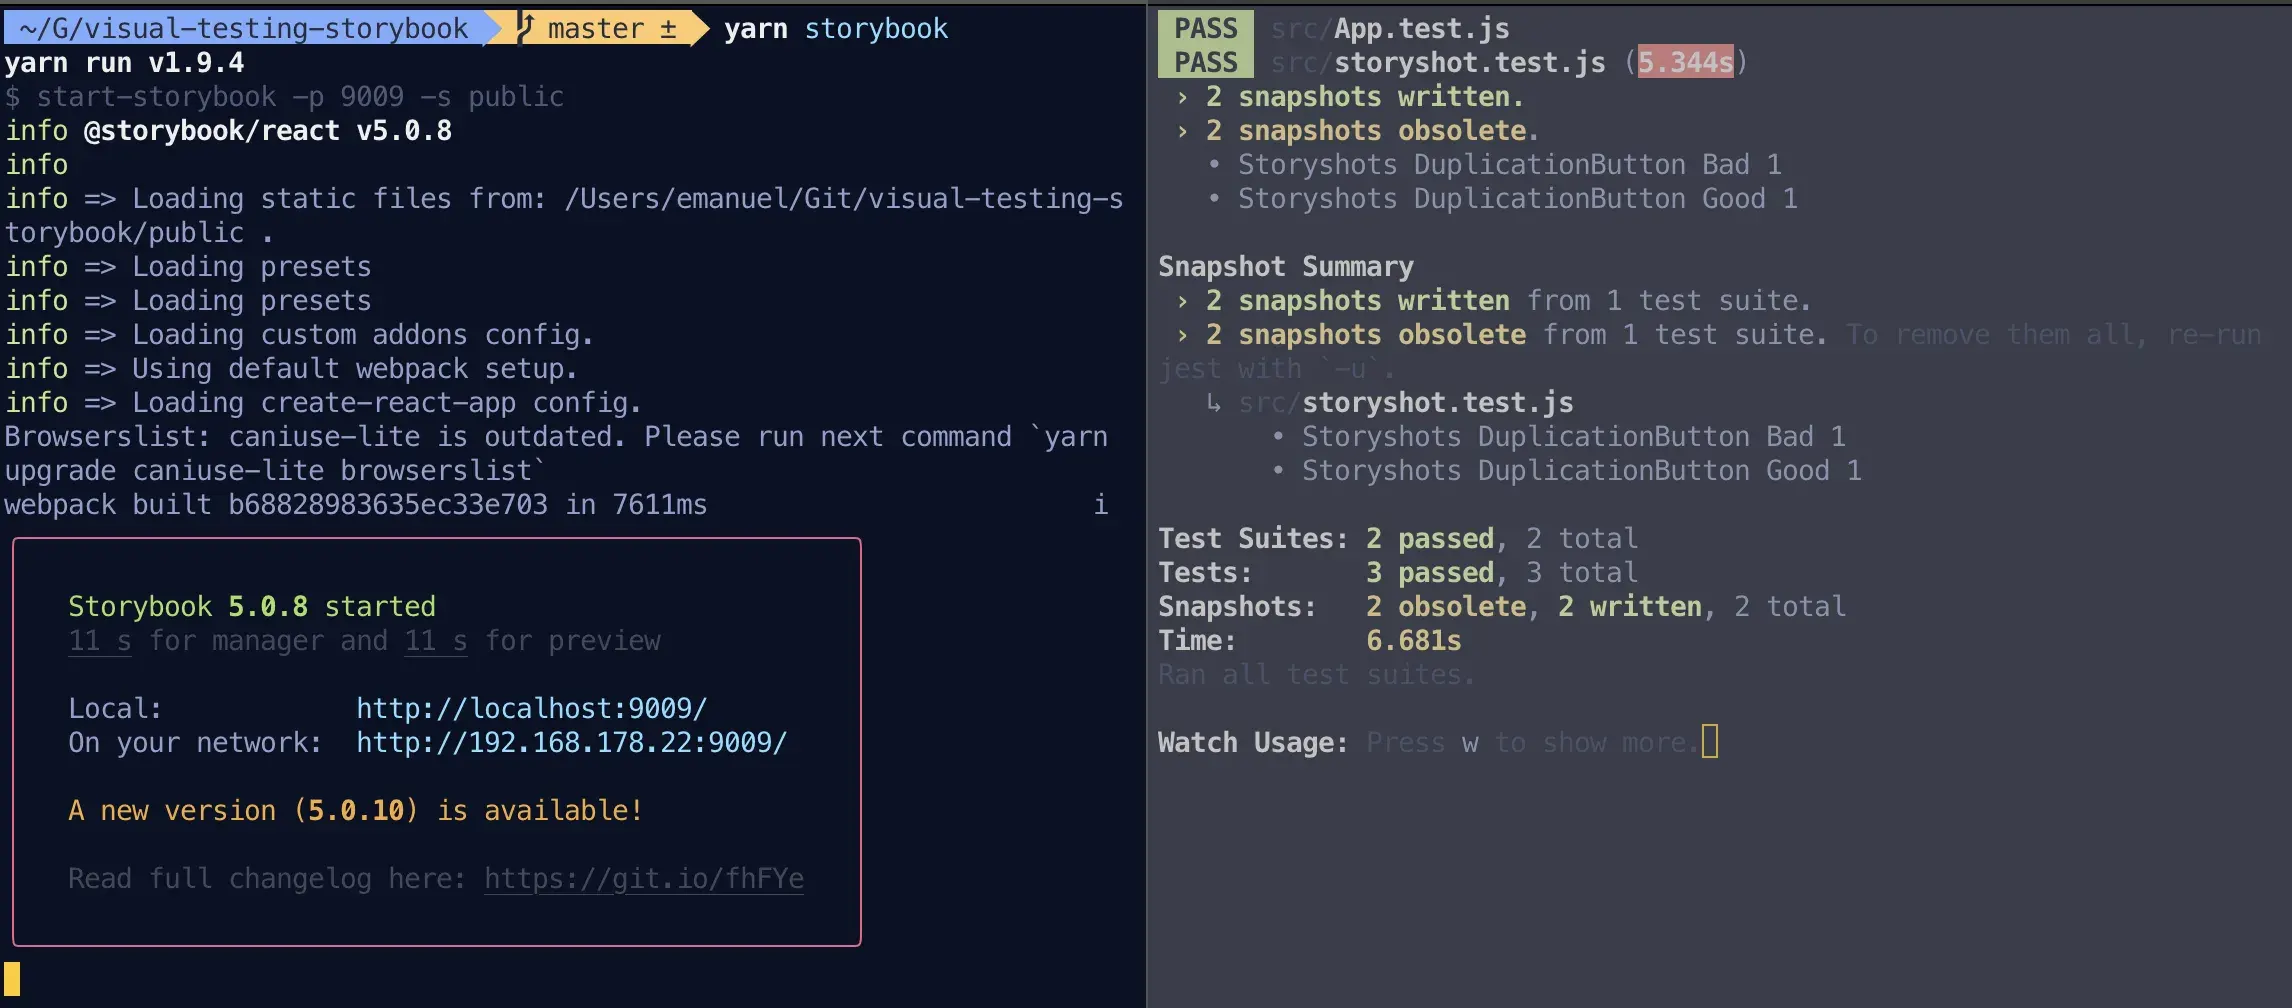
The old snapshots are obsolete (you can safely delete them) because now we have a new folder called image_snapshots where there is a picture for each story. And every time a component changes what it renders, tests will fail and you can check it with a visual diffing between the stored image snapshot and the new image.
Running on CI ⚙️
Having two terminal opened at the same time it’s something that we can only do in development. But when it comes to automatize this task, things can be a little bit tricky.
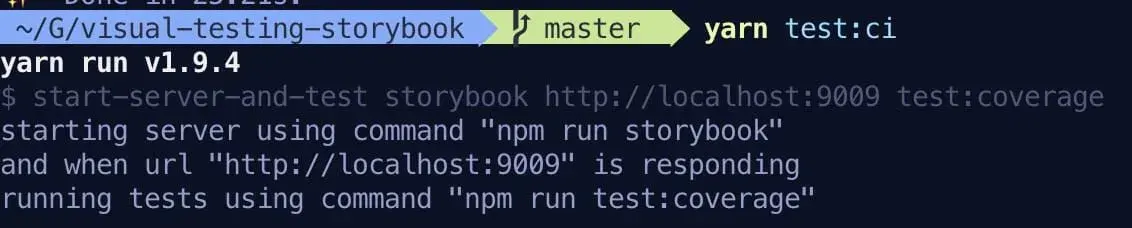
Luckily someone thought about this problem and made an npm package, called start-server-and-test which does exactly that! You need to specify the command to “start the server”, once the server is up and running, it will the command of “test” that you specified and once that process is done it will kill the server.
yarn add start-server-and-test
Inside package.json , you need to create a new script which will start storybook, then listen until http://localhost:9009 is up and running and execute the tests.
"scripts": {
  "test": "react-scripts test --coverage",
  "storybook": "start-storybook -p 9009 -s public",
  "test:ci": "start-server-and-test storybook [http://localhost:9009](http://localhost:9009) test",
},
Interactive Visual Testing 🕺
Sometimes you would like to interact with the story before taking the picture. In order to do that, you need to follow a different approach than the previously showed. You can achieve this by using a customer jest matcher called jest-image-snapshot , and any end-to-end framework. In this case, picked puppeteer .
yarn add -D jest-image-snapshot puppeteer
In order to enable jest-image-snapshot, you need to extend the function expect from jest . The recommended way of achieving this with create-react-app is by creating a file inside src with the name of setupTests.js . This file will be loaded before all the tests started, which will enable us to use this custom matcher.
// src/setupTests.js
import { toMatchImageSnapshot } from "jest-image-snapshot";

expect.extend({ toMatchImageSnapshot });
Then create the test file when we are going to check the behavior of DuplicationButton, let’s check how it looks when the user clicks on it twice.
// src/DuplicationButton.test.js
import puppeteer from 'puppeteer';

describe('<DuplicationButton />', () => {
  let page;

  beforeAll(async () => {
    // init puppeteer page
    let browser = await puppeteer.launch();
    page = await browser.newPage();
  });

  it('should duplicate content after clicking', async () => {
    // navigate to fullscreen story
    await page.goto(
      '[http://localhost:9009/iframe.html?id=duplicationbutton--good'](http://localhost:9009/iframe.html?id=duplicationbutton--good'),
    );

    // click on the button
    await page.click('button');

    // take screenshot and compare
    const screenshot = await page.screenshot();
    expect(screenshot).toMatchImageSnapshot();
  });
});
In order to run this test, we need to start Storybook or you can directly use yarn test:ci which will do it for you! This is how the screenshot looks like:

My Experience working with Visual Testing 🙋♂️
As with all the new technologies/frameworks, I tried Visual testing first with a side project in which I saw a possible improvement. The project itself was a collection of weather icons made with React and styled-components, called weather-styled-icon.
The first release I made of this library I wrote all the tests with enzyme, following a structural testing strategy. In simple words, I was rendering an icon with mount and then running checking if a node exists, and in order to check how it “looks” I was running expect.toMatchSnapshot of the resulting styles. As you can imagine, this way of testing is very time consuming, but nevertheless, I was able to finish all of them.
The problem came when I decided to update the version of styled-components from v3 to v4 because I wanted to start using some of the cool new APIs, like ThemeProvider or the styledAPI to style existing styled-component components.
After I made all the changes inside the code, all my tests were broken due to I moved, added and removed components, also I changed the internal implementation of mostly all of them. At this point, I realized I was testing the implementation of my components and not the really the output I was expecting.
So I made the decision to give a try to Visual Testing because it seemed the most suitable testing strategy for my situation, where I want to check exactly how the icons and them variations looked like. I followed the same steps that I already explained above and I ended up having a better suite of tests with way less code. This is the difference of lines of the merged Pull Request!
Do’s and Dont’s ✍️
I think Visual Testing is an excellent way of testing and I highly encourage you to at least try it in a side project where you can play with it and see if you like it or not. However, I would like to highlight a few important things to do and NOT to do regarding this topic:
- ❌ Don’t check the styles of your components with code, instead, take a real image of the component.
- ✅ In case you are using Storybook in your development workflow, you can have one visual test for all the stories without any real effort.
- ❌ Visual testing does NOT replace other strategies of testing, it just adds another testing layer to your application.
- ✅ You can easily integrate it with your current end-to-end tests.